Before getting into what dental whitening is, let’s first know about why it is needed. The outermost part of your teeth is called enamel, and the layer just beneath is called dentin. Dentin is yellow-brownish in color. The enamel gets damaged due to various reasons like aging, smoking, regular consumption of alcohol, and acidic drinks.
Once the enamel is damaged, dentin is exposed. This is the reason why your tooth tends to look yellow-brown. That’s where the need for dental whitening emerges.
Dental Whitening: The Alternatives
Several over the counter medicines, ointments and mouthwashes are available in the market, which claims to be the best for dental whitening. Several home remedies are suggested too. However, when practically used, none of these proves to be beneficial.
It is therefore recommended to go for dental whitening. This procedure may be a bit heavy on your pocket. However, the results are worth it.
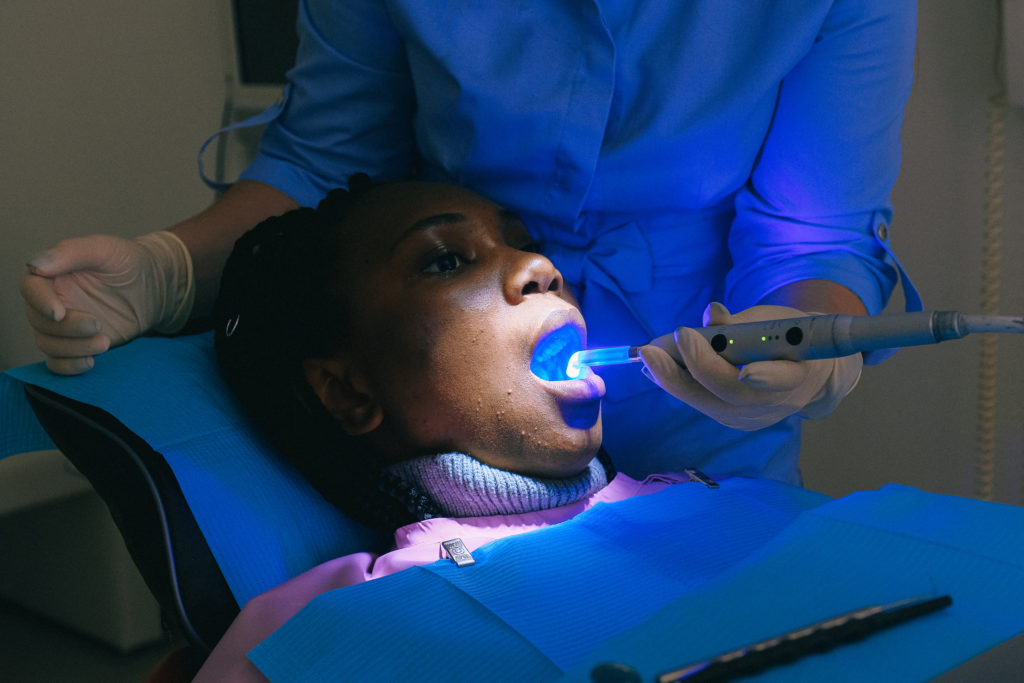
Steps Involved in Dental Whitening
Dental whitening is not a complicated process at all. However, it is a bit expensive, and the results may vary from person to person. The main steps of this process include:
- Assessment of the actual shade of your tooth: This helps your dentist to determine how much whitening your tooth needs. Then the whitening solution is prepared
accordingly. - A grainy material known as pumice is used to polish your teeth so that plaque may be removed easily from the surface.
- Gauze and retractors are used to keep your mouth dry and keep other parts of your mouth untouched with the whitening solution.
- Protection is provided to the gums too so that they may not come into contact with the whitening liquid.
- Then comes the real part, the whitening agent. The most commonly used bleaching agent for whitening the tooth is hydrogen peroxide. It is applied carefully and leftover for a predetermined period. Typically, this period may range from 30-60 minutes. The solution reacts
 with the stains present on your tooth and whitens them.
 - After a few minutes, when your dentist feels that the desired result has been achieved, you are asked to brush your teeth so that any unwanted residue may be cleaned off. You will also be asked to rinse your mouth thoroughly and then keep it dry for a few more minutes.
- Finally, fluoride varnishing is done to retain the whiteness thus achieved. This varnish also ensures that plaque doesn’t come back again.
Once the process is complete, you may be asked to follow certain prescriptions. Beverages like soda, alcohol, or artificial sweeteners must be avoided for the first 24 hours at any cost. Smoking and the use of any tobacco products must be avoided too.
Chat with your Dentist
Another most important thing to remember is that not all teeth can be whitened. If the tooth is more of brownish than yellow, the results may not be as good as you expect them to be. It is therefore always advisable to have a one on one chat with your dentist, clear your mind beforehand, and then decide whether or not to go for tooth whitening.
